Thursday, April 21, 2011

High Contrast, Vintage Coloring, and Pictoralism


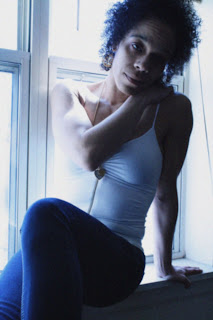
Pictoralism:
-Technique: My mom offered to be my model for a few shots, and instead of portraying love, she portrayed the opposite, heart-broken. After that I messed with the camera angle, and the location of her body for a while, but then I realized that the windows in her room gave the most lighting, and that's when I told her to sit in the window sill because it would give a lot of back lighting, which would complement the picture a lot. Then for editing, first you need to make sure the picture is on safe filter mode. And after doing so, add a layer mask to protect the pixels in the image. After that, add noise in the filter mode, and then add some Gausian blur to make a fuzzy vignette around the entire image. After I went back through the steps and added some more noise to make the pixle-ish look pop more.

-Assessment: One thing I really wish I would have done, was to have been more brave with the noise, so the picture looked more like pictoralism. It wasn't the best edit I could have made with this particular concept.
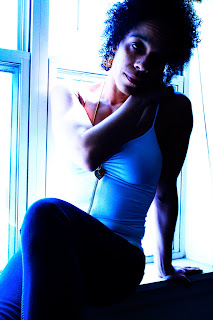


High Contrast:
-Technique: Editing pictures to give them high contrast is pretty simple actually. Just go to the curves tool in the adjustments bar, and make an "s" shape, but play with it a little more to make sure that the contrast really pops.

-Assessment: I don't really have any weaknessess I feal, for this picture, besides maybe adding a little more light to the picture in general before adding the high contrast.
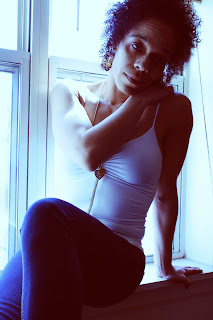

Vintage Color:
-Technique: Vintage coloring is also as simple as the high contrast. Go to the curves tool in the adjustments bar and click the scrool down bar to get the different color selections and mess with the colors. The red is supposed to be pulled down on the top, and above on the end, to make an "X" type mark. After that the blue and green should be bent to make the "S" shapes. In the end the colors all balance out, but you can continue to play with the colors to get the ending result you like most.

Assessement: I think this picture went very well, I don't have any weaknessess for this one either.

Monday, April 18, 2011

Text and Image


Technique: First, I tried using the pencil tool to create the heart shape, for the lyrics. But, that didn't work well in the end. So, after getting some help from my teacher, I discovered that you can take the elipses shape tool, and bend it to make different shapes, and eventually I was able to create a heart that was more well-rounded and shaped more like a heart. Afterwards I played with the the text tool, but I knew exactly which lyrics I wanted to use. I chose to use lyrics from the song 'Sigh No More' by Mumford&Sons, because it's my favorite song on their album, but also because the lyrics are very heartfelt and real. From there I chose different fonts and colors to really express the lyrics as best as possible. Although if I had more time, I would have probably found colors and fonts that were even better. Overall, I was happy with the way the picture turned out.


Assessment: Firstly, I should have retaken the image to reveal some more of the heart shape, so that it became more obvious that the picture was of a heart shaped box, instead of some random heart shape. Just overall the clarity of the image should have been better. Secondly, I wished that the heart shape, fit the image more than just looked like it was posted on the the image. Overall, in the end, I am pretty satisfied, I just know that it could have been better.

Tuesday, April 5, 2011

Sharpen Assignment

Technique: Well firstly, in the process of editing I lowered the vibrance in the picture, because it was just too bright, and it kept the sharpen from fully popping out of the picture. Afterwords, I sharpened the image, twice, using the High Pass, on the filter. And eventually the picture came out right. After that I played with the color and vibrance and got it to fit the sharpen so that it all came together and popped. Reflection: Overall, the picture and editing went well. I just have to remind myself next time, that when taking pictures inside, with fairly bright lighting, I should turn down the ISO so that the picture isn't overly bright so that it takes away from the subject, and the picture overall.